DEMO
Connect Demo-Company's
QuickBooks Desktop to DEMO
QuickBooks Desktop to DEMO
Step 4 of 6:
Follow the instructions below to authorize the QuickBooks Web Connector to connect your company file to DEMO:
1
Click "OK":

2
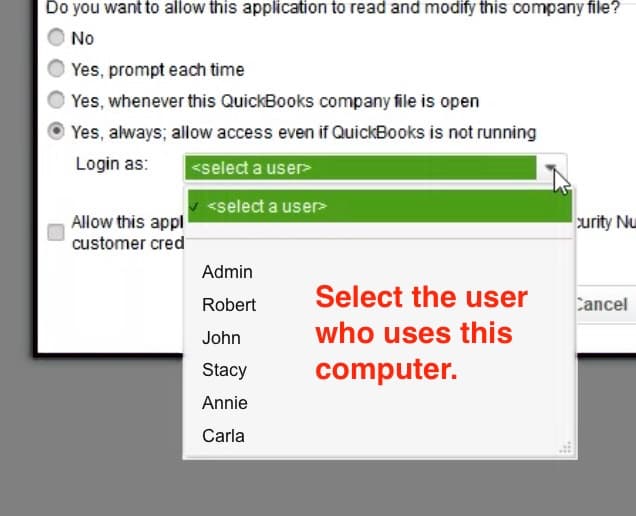
Select "Yes, always; allow access even if QuickBooks is not running":

3
Click "Yes":

4
Click "Login as" and select the user who uses this computer. If you do not see this option, skip to the next step.
⚠️ IMPORTANT: Select the user who normally uses this computer
If your DEMO connection syncs while no one is signed in to the company file on this computer, QuickBooks signs in with the user you select here. This includes when QuickBooks is at the "No Company Open" screen.
To avoid conflicts, select the user who normally uses this computer so QuickBooks does not try to sign in as someone who may already be signed in elsewhere. If QuickBooks tries to sign in as a user who is already signed in somewhere else, the sync can fail. If you want a user reserved for syncing, follow our guide to creating a dedicated QuickBooks Desktop user.
If the company file is already open under a different user with Full Access permissions when syncing, QuickBooks will use that user's active session instead.
5
Click "Continue..." and then "Done":
